Can You Eat Cereal With Braces?
Cereal has been a breakfast staple for decades. Many of us enjoy a nice bowl of our favorite cereals to eat for breakfast. However, if you have braces, you may be wondering if you can enjoy your favorite cereal.
The process of getting braces can be confusing at first – but this guide will help you understand everything that happens on the way to your healthy smile.
Orthodontist Selection Tips for Braces
People usually find an orthodontist in two ways. One way is through a referral from their general dentist. The other way is by doing their own research.
Your dentist might already have a trusted orthodontist to recommend. But, you can also take charge of your Orthodontic Journey. You can find an excellent orthodontist for yourself or a family member by doing your own research.
Great ways to find an expert orthodontist:
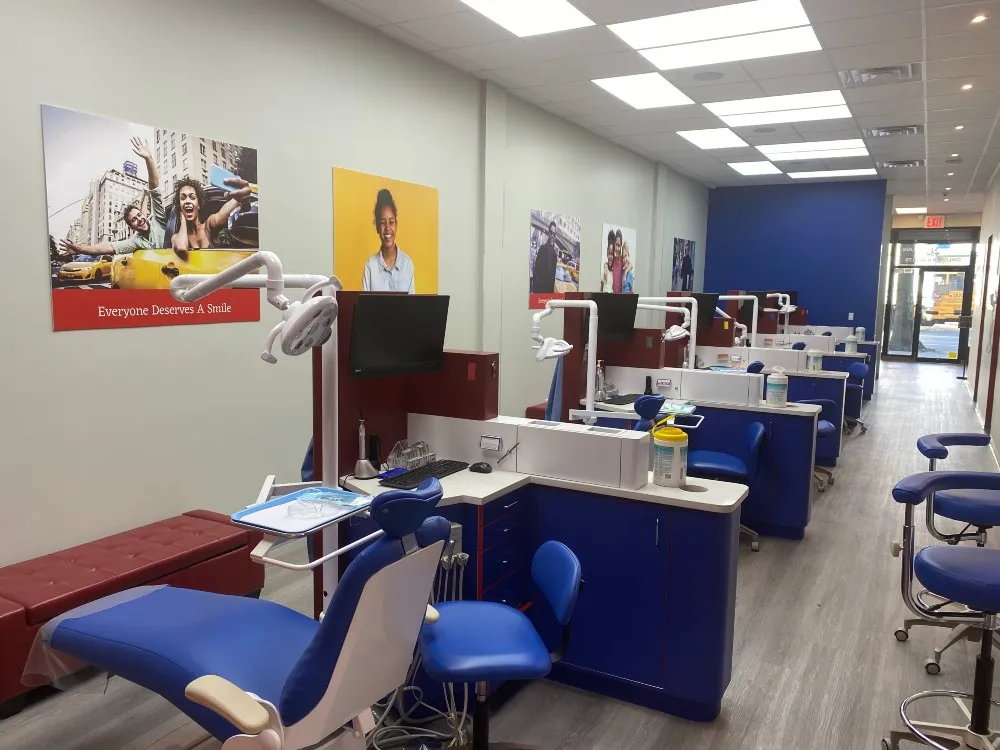
For better experience and lower costs, choose a free-standing orthodontic facility over a general dentist’s office. Orthodontists, unlike general dentists, have specialized training in orthodontia. They focus solely on teeth straightening, which often results in lower costs.
The image you provided shows such a facility.
Recently, mail-order orthodontics have emerged, offering at-home clear aligner treatment. While this may seem convenient, it poses serious health risks because of the lack of direct doctor supervision. In-person treatment is essential for safe and effective results.
Numerous complaints have been lodged against these mail-order companies. Thoroughly researching these treatments is crucial to understand the risks involved.

Once you select an orthodontist, you set up a no-cost consultation. This consultation includes several appointments. The purpose is to explore different treatment options and get cost estimates.
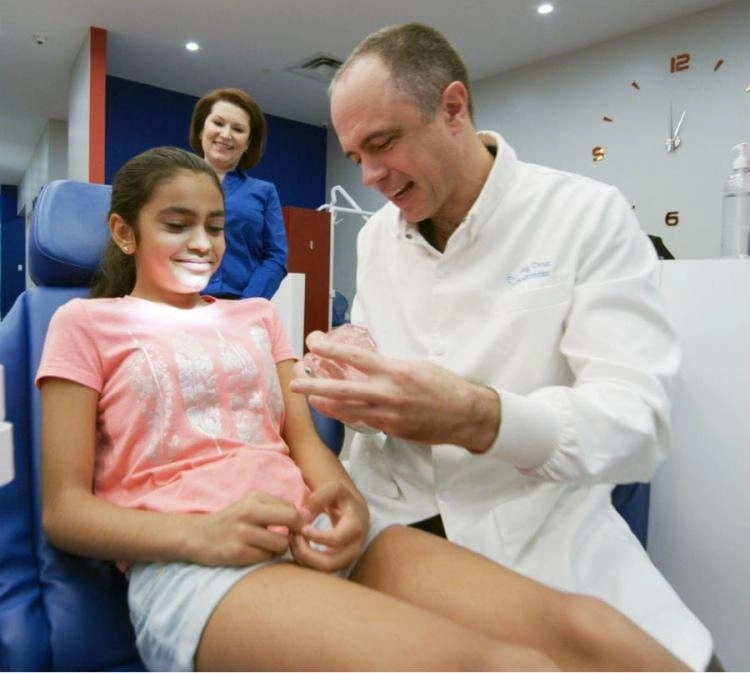
In these appointments, the orthodontist evaluates your dental health. They take necessary x-rays and photos. They also diagnose your condition, which might have multiple aspects.
This process is part of your Braces consultation and treatment plans. A crucial step in your orthodontic care. The treatment time can vary based on the complexity of your condition.
After your diagnosis, you and your orthodontist will discuss treatment plans. Some types of braces are less effective for certain conditions. Your doctor will suggest the best treatment for your crooked teeth and give an estimate of how long it will take.
If you prefer a specific treatment appliance, like ceramic braces or clear aligners, let your doctor know. They can check if your case can be corrected using that appliance.
Braces, whether they are traditional brackets and wires or clear aligners, work by applying pressure to your teeth. This pressure slowly moves your teeth into their desired positions. A long-term process that requires patience and commitment.
Wearing your aligners for at least 22 hours a day is crucial for the treatment to be effective. Not wearing them as instructed can lead to issues like tooth decay and gum disease. Regular check-ups with your orthodontist are also important to monitor your progress and make any necessary adjustments to your treatment plan.

During your consultation, you’ll receive a quote for your chosen treatment. This is the time to discuss creating a payment plan for braces with your orthodontic team and administrative staff.
The staff can assist with negotiations with your insurance company. Many offices manage billing directly. You can provide your insurance details to them and settle the balance in one go or through monthly installments.
Inquire about the billing procedures at your orthodontic office. If the office handles direct billing to the insurance company, it can save you significant time and effort.

Before getting braces, you’ll fill out paperwork, including an Informed Consent to Treat, showing you understand the risks. If you’re under 18, a parent or guardian will sign for you.
You’ll also sign medical release and privacy forms, and possibly a photo release form. You’ll agree to a contract for payment in exchange for care. Ensure you understand all forms before signing, and ask for an interpreter if needed.

After signing forms, your orthodontist plans your unique treatment. Traditional metal braces or clear braces can start immediately with bracket bonding and archwire installation. Other treatments like Invisalign and lingual braces require a wait time of 3 to 6 weeks for detailed planning and material preparation, hence they cost more.
Consultation Stage During your consultation, the team will provide a quote for your chosen treatment. You’ll also discuss payment plans with them.
Adjustment Period After you start wearing braces, you’ll need some time to adjust. Feeling some discomfort as your teeth and mouth adapt to the new orthodontic treatment is normal. Many ways to manage this discomfort at home exist.
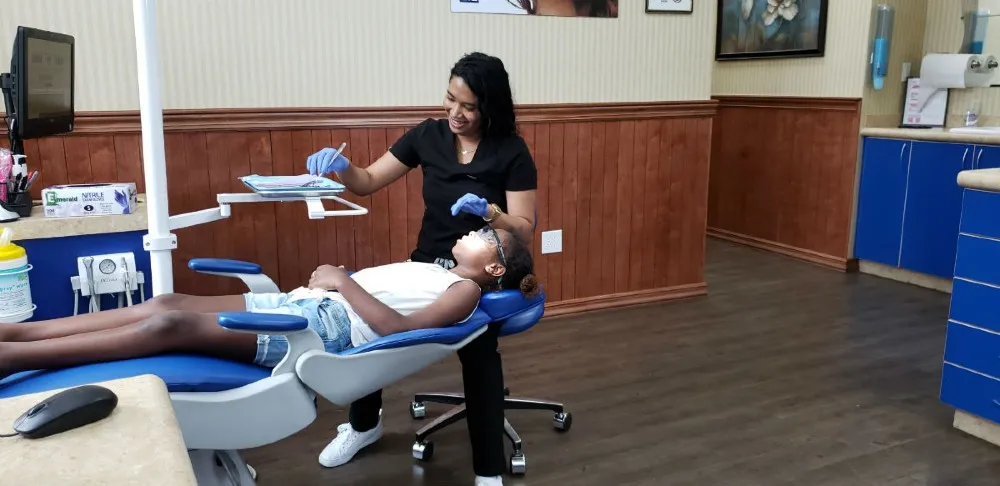
Routine Care and Adjustments Routine care and adjustments during orthodontic treatment are crucial. This involves regular brushing of your teeth to maintain oral hygiene while you wear braces.
Maintaining oral health at home is crucial during orthodontic treatment. Follow your orthodontist’s dietary and cleaning instructions. Daily brushing and flossing keep your teeth and appliance clean, aiding your treatment. Use specialized tools to clean braces and prevent plaque, gingivitis, and discoloration.
.
During orthodontic treatment, regular dental visits are needed for cleanings and check-ups. Adjustments are made to braces, with metal ones needing tightening and elastic changes. Clear aligners are replaced with new sets.
Fixed appliance patients have 4-12 week check-ups, while Invisalign patients have less frequent visits. Emergencies can often be managed at home and addressed in the next visit.
Treatment duration varies per case and type. Generally, braces straighten teeth in 12 to 36 months. Completion marks the end of treatment and a new smile.
Cereal has been a breakfast staple for decades. Many of us enjoy a nice bowl of our favorite cereals to eat for breakfast. However, if you have braces, you may be wondering if you can enjoy your favorite cereal.
Braces are worn for anywhere between 12 and 36 months. The average is about 24 months, but treatment lengths differ depending on your specific case and the type of treatment.

Looking for a braces-friendly snack while you finish work or watch your favorite TV show? There are a wide variety of braces-friendly snacks, perfect for patients with all sorts of tastes.

Some patients may not have severe malocclusions, but they could still have minor bite issues that warrant correction.
If you’re a former braces wearer, then you might be disappointed to see those successful results beginning to wane.

Braces wearers and those of you with a sweet tooth should brace yourselves: you're not going to like what you read here. No, you cannot eat gummy candy with braces.

Peanut butter is a staple food in many diets across the world as one of the most versatile foods available.

One of the best ways to prevent delays in your braces treatment is to watch what you eat.

You’ll find the best orthodontists providing affordable braces treatment at Diamond Braces in Stamford, CT! We proudly serve Stamford, Darien, Norwalk, New Canaan, Greenwich, Westport, Wilton, and more – and have been creating Diamond smiles for over 20 years.

Looking for an affordable, effective braces solution for your family? Great news: you can find it right in your neighborhood in Queens!
When most people think about getting braces, the first thing that comes to mind is straighter teeth. What they don’t realize is all of the health benefits that come along with orthodontic treatment.

Navigating Orthodontic Cuisine - Your Comprehensive Guide to Eating Right, Maintaining Oral Health, and Embracing Delicious Meals While Embarking on Your Journey to a Straighter Smile.

Navigating Orthodontic Transformation at Any Age: A Comprehensive Guide to Age-Related FAQs About Braces.
Are you considering braces as a solution to straighten your teeth and achieve a confident smile? This comprehensive guide provides answers to frequently asked questions related to purchasing braces, ensuring that you have the information you need to make an informed decision about your orthodontic journey.

The cost of traditional metal braces starts at $3,600. This price includes labor and materials.

The cost of braces for adults can fluctuate widely. This variation is due to factors such as the type of braces chosen and the complexity of the individual’s dental condition.

We offer braces payment plans starting at $89 per month for 24 months. These plans come with 0% interest loans.

In the realm of oral health, the prospect of wearing braces as an adult often comes with the assumption that the costs won’t be fully covered.

At Diamond Braces, we believe everyone deserves a straight smile. Our first step is an orthodontic evaluation. This helps us understand your needs and plan your treatment.
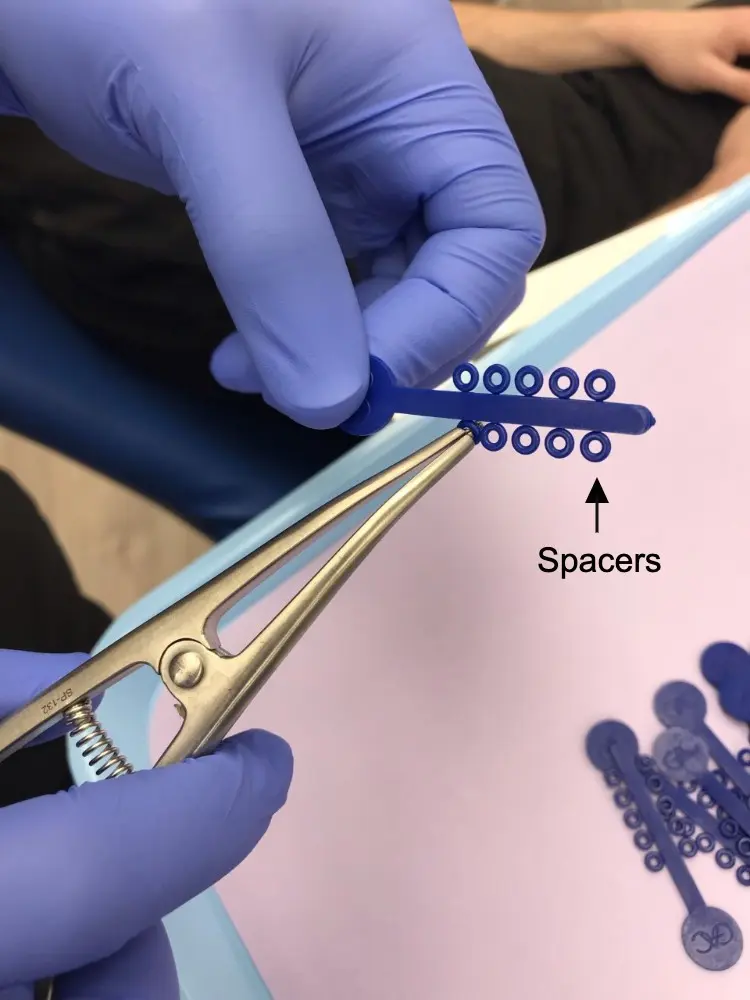
Spacers are generally used for a week or two before braces treatment, to create small gaps between certain teeth.

Once your orthodontic treatment is complete, your misaligned teeth are corrected, and your teeth are straightened, it’s time for the day everyone looks forward to: the removal of braces, or de-bonding.

At our dental clinic, we believe that everyone deserves a beautiful smile. We understand that financial constraints can often pose a challenge.

If you’re experiencing discomfort from your braces, certain foods can help. Initially, stick to soft foods. This will ease the adjustment period for your teeth.

When comparing the cost of dental veneers and braces, veneers often have a lower initial cost.

Color combinations can indeed be fun and exciting, especially in representing seasons or sports teams.
At Diamond Braces, we hold a firm belief: a beautiful smile equates to a happy smile.
Interested in knowing the cost of braces? You're not alone; it's a common concern for those considering orthodontic treatment.
Deciding to pursue a perfect smile with braces is a significant step. At Diamond Braces, we recognize the importance of understanding the costs involved.
Braces pain relief with ice cream: Ice cream is a great solution for braces pain relief.

Orthodontists use braces spacers to create space between teeth. This space is necessary for the orthodontic appliance, specifically the molar bands.
Imagine biting into a crisp apple, chewing a piece of steak, or enjoying corn on the cob without any difficulty.

Experiencing pain or soreness as your teeth move to their correct positions is normal.